Allow upload to database
To be able to upload files to a database, you must first allow file upload on them.
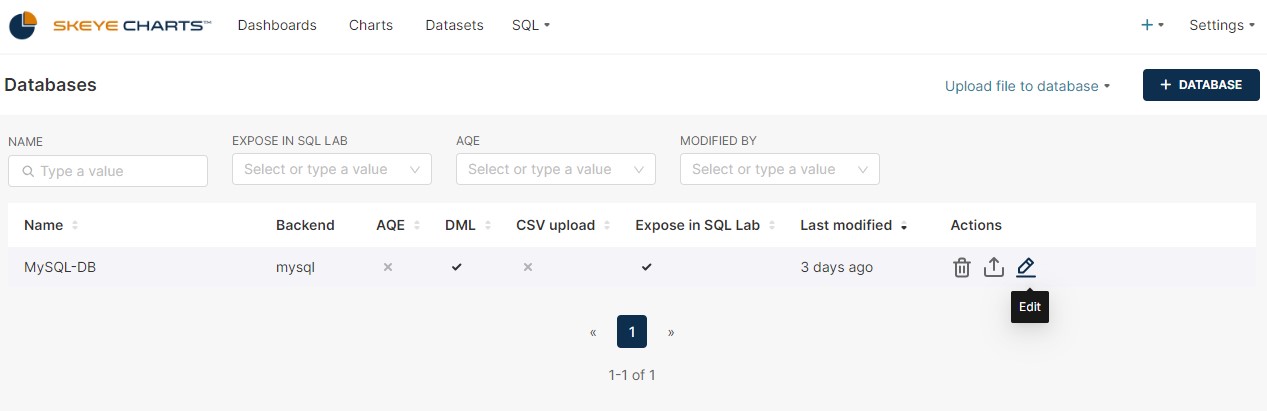
Navigate to Settings -> Database Connections and click the edit on the database you want to allow uploads on.
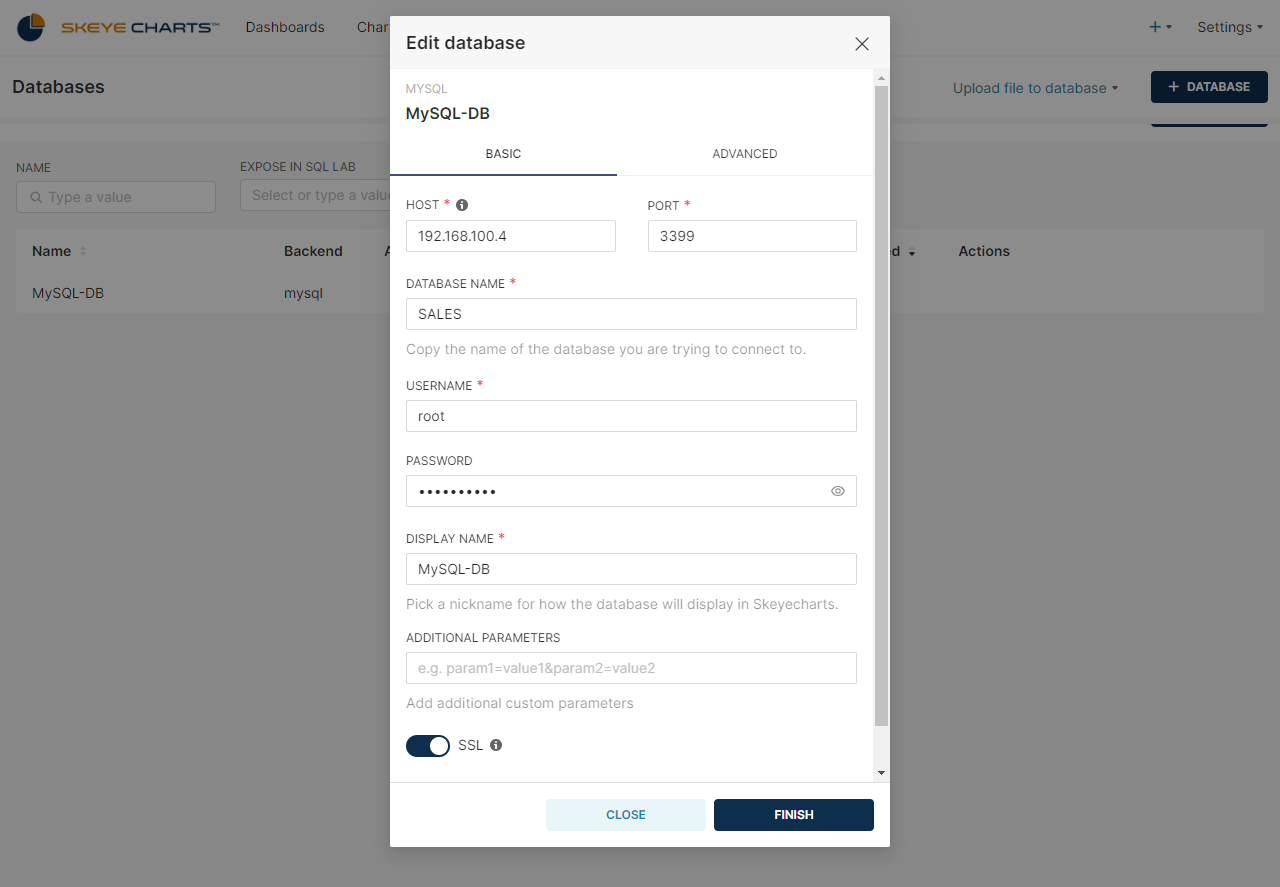
A popup window will show where you can edit the database config.
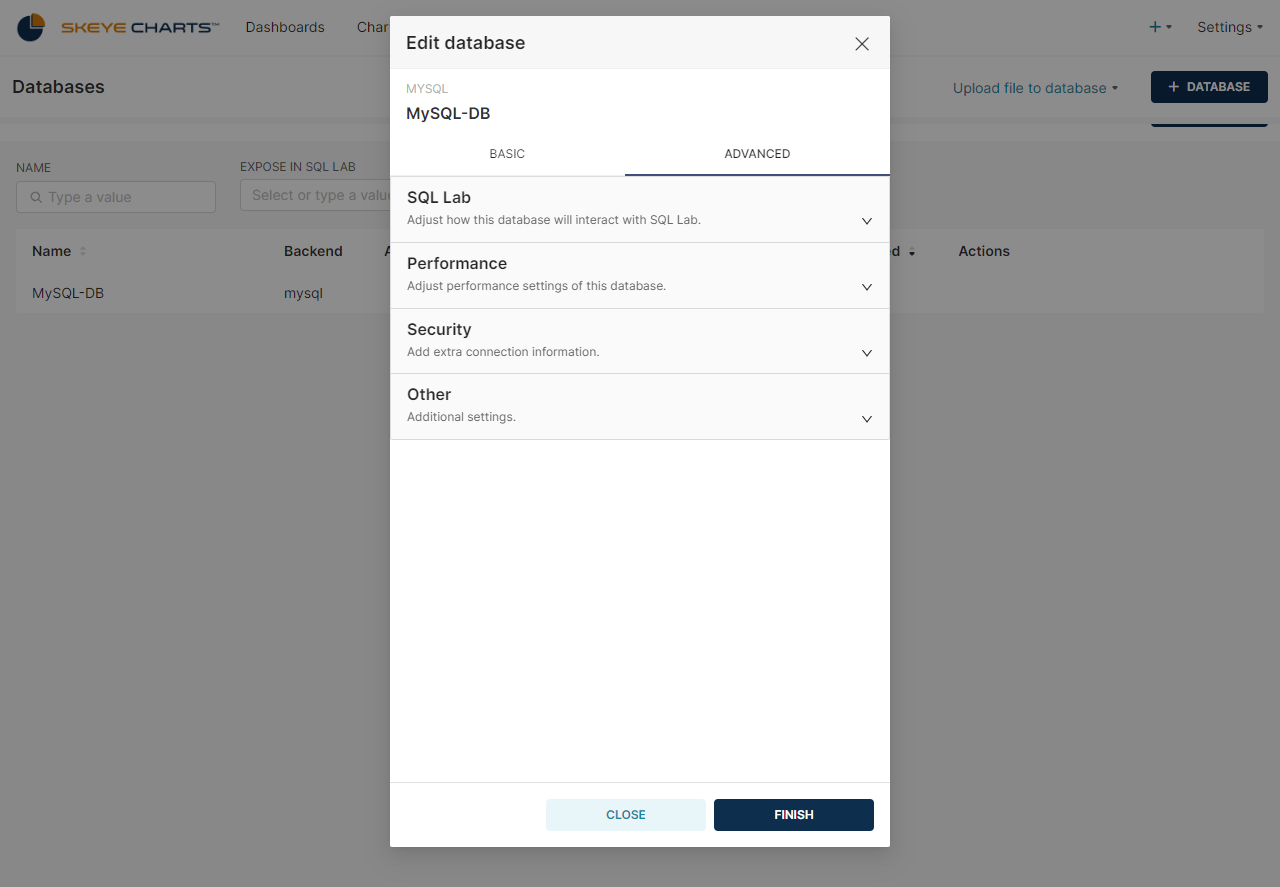
Navigate to the ADVANCED window on the top of the popup.
Within the Security section, you will find an option labeled Allow file uploads to database that can be enabled.
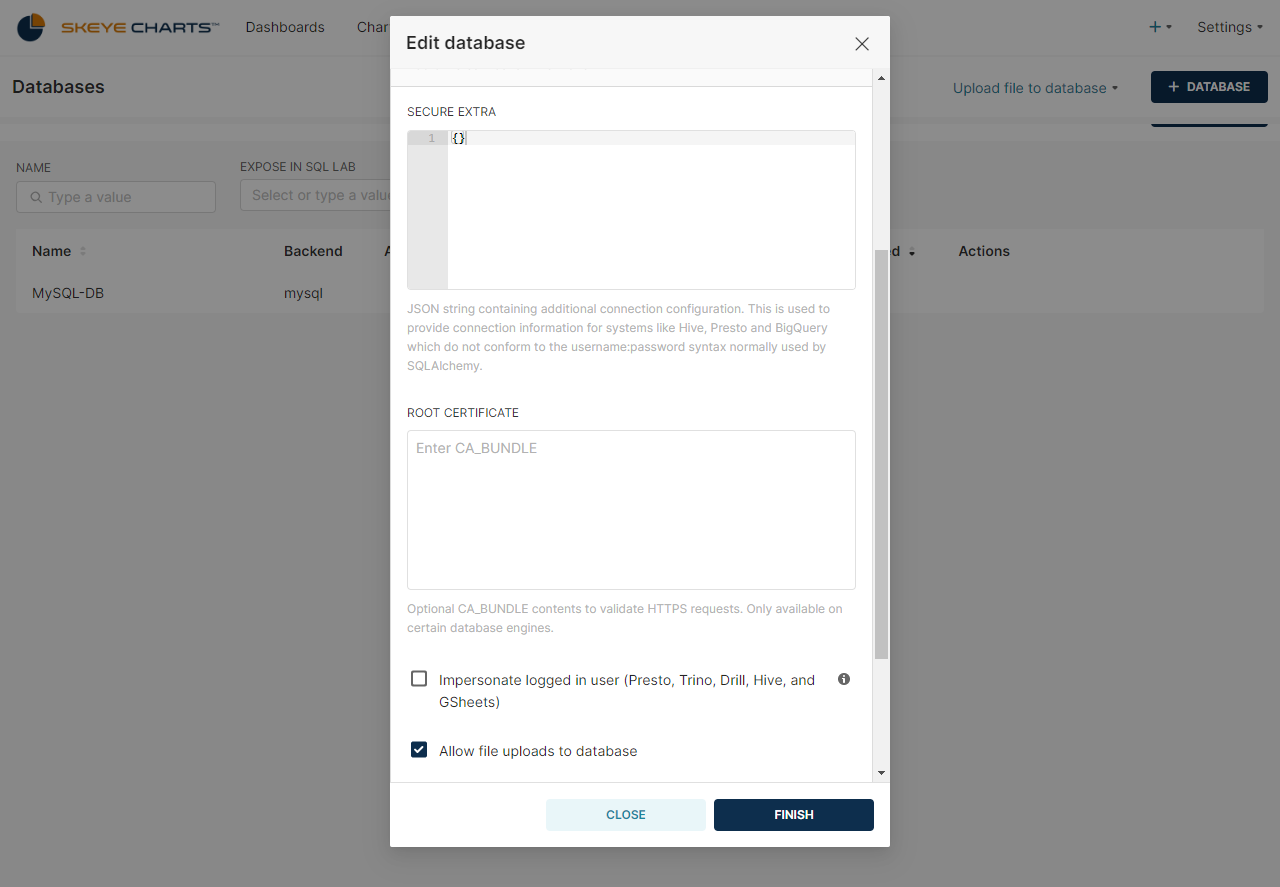
Click FINISH after enabling it and you should now be able to upload files as tables to that database.
File upload example
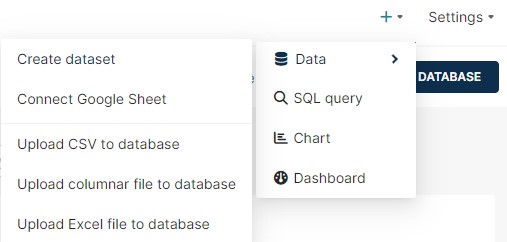
Now let's upload a csv file to demonstrate, this can be done in the Database Connections section by clicking the Upload file to database -> Upload CSV button, or under the + -> Upload CSV to database which should now be enabled.
+ menu:
Database Connections section:
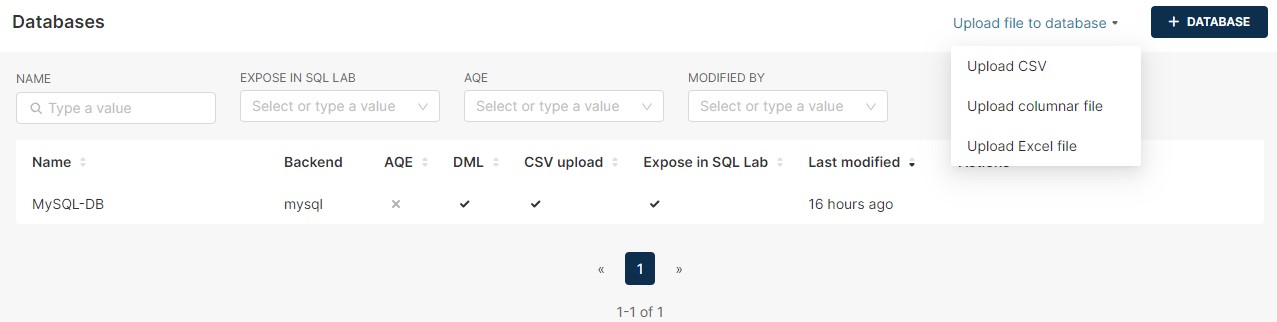
Both of these buttons will end up taking you to the CSV to Database configuration form:
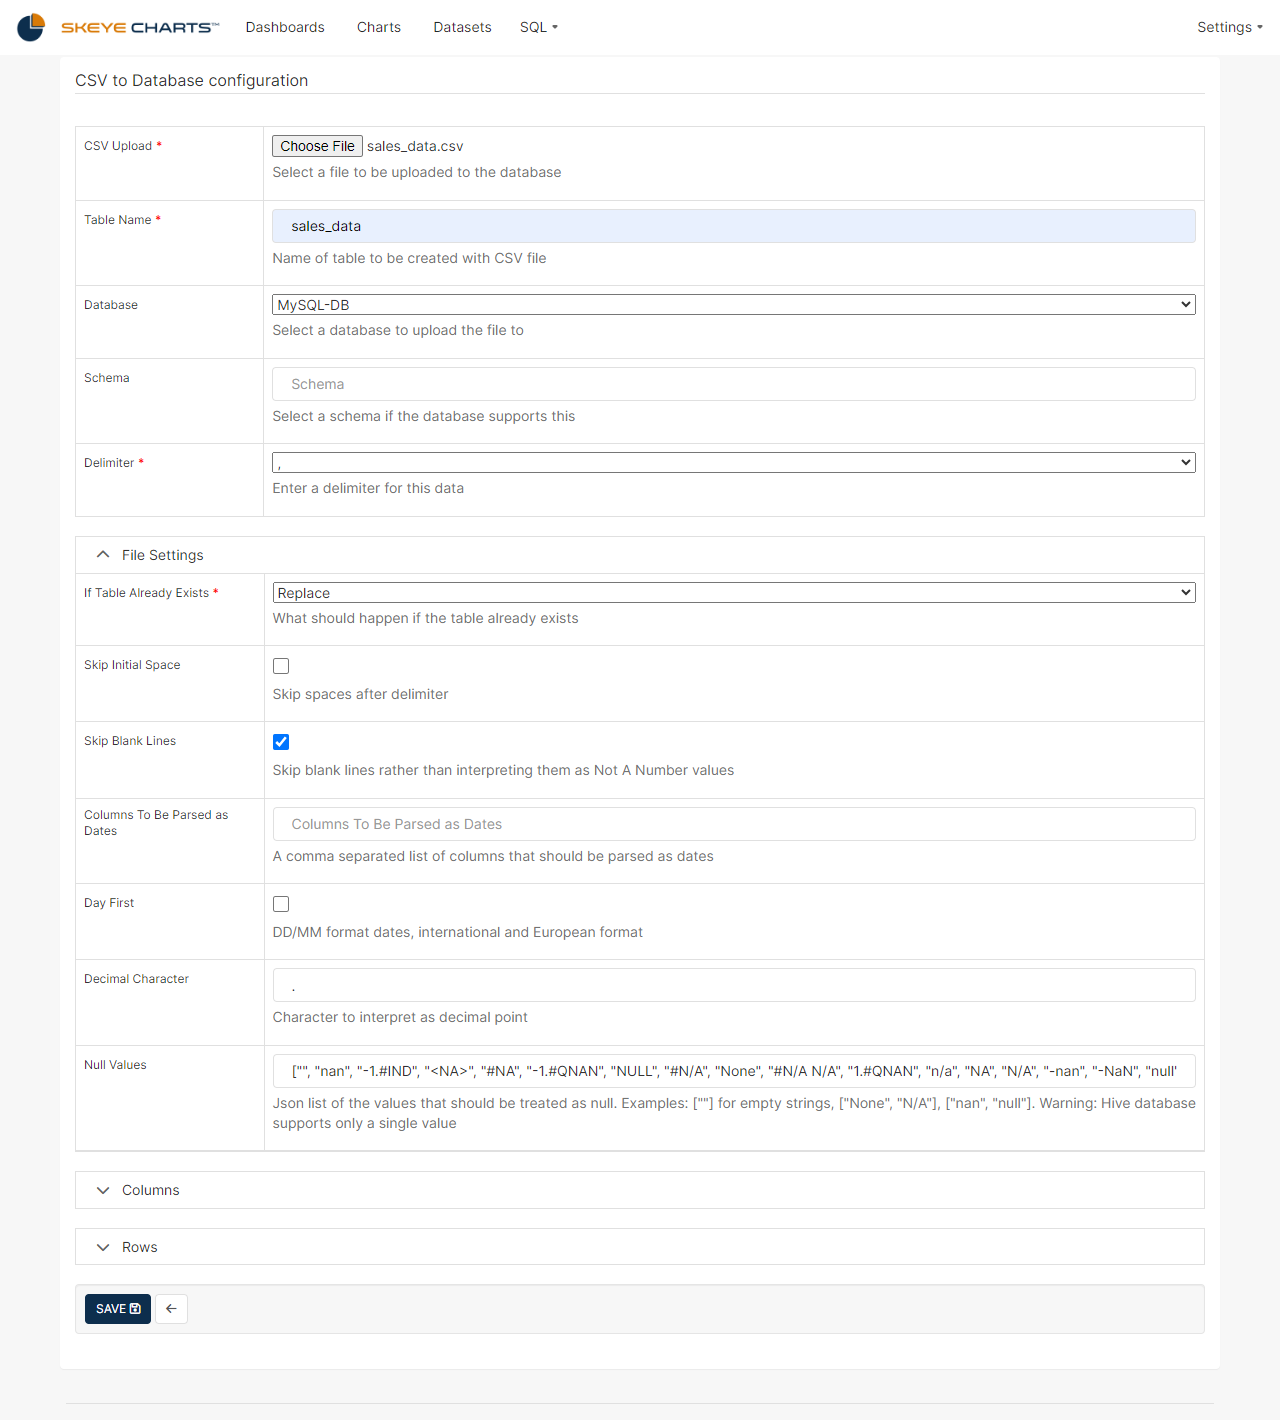
This page offers various options to configure the upload process. The key options, which you should prioritize, are marked with a red asterisk *.
- In the CSV Upload you choose the file you want to upload.
- Table Name will be the name of the table in the database after it's loaded
- Delimiter is set to , by default, but other delimiters can be specified as needed
- The If Table Already Exists is used to determine what to do if another table with the same name exists in the database,
it can be set to either:
Fail: Not continue with the upload.
Append: Add the data to the existing table.
Replace: Replace the old table with the new one.
Other settings can be set, but these are the main settings that should be addressed on every upload.
Clicking the Save button will result in the file being uploaded to the database and a dataset being added and ready to be explored on skeyecharts